Hi All,
Viewing Page Data in Excel Using PowerPivot (OData) : NAV 2016
This walkthrough describes how you can use OData to expose a Microsoft Dynamics NAV 2016 page as a web service and then analyze the page data using Microsoft PowerPivot for Excel 2013
Prerequisite:
Microsoft Excel 2013 with Microsoft PowerPivot enabled, or Microsoft Excel 2010 with the PowerPivot add-in for Excel 2010 installed.
1) Publishing a Page as a Web Service :
1) In the Search box, enter Web Services, and then choose the related link.
2) In the Web Services page, choose New.
3) In the Object Type column, select Page. In the Object ID column, enter 21, and in the Service Name column, enter Customer.
This exposes the Customer Card page as an OData web service.
4) Select the check box in the Published column and close the page

2) Verifying the Web Service’s Availability
In the Internet Explorer field, enter a URI using the following format: http://://OData/
Server is the name of the computer that is running Microsoft Dynamics NAV Server.
WebServicePort is the port that OData is running on. The default port is 7048.
ServiceInstance is the name of the Microsoft Dynamics NAV Server instance for your solution. The default name is DynamicsNAV90.
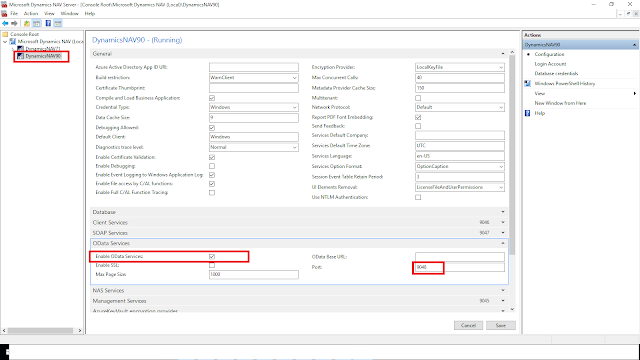
In my case Port No. is 9048 and Please Enable the ODataServices for Service Instance as shown in screenshot.
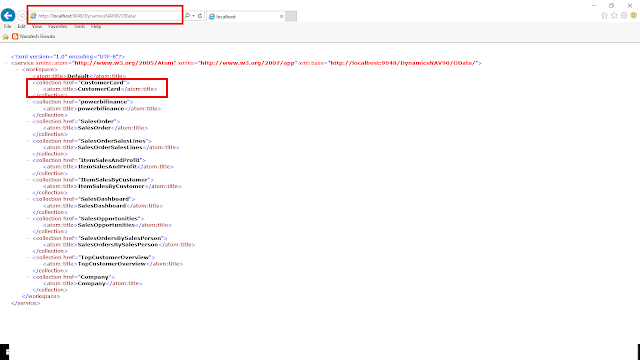
So below is the URL for me, please run the same in Internet Explorer and you should get your published web service.
http://localhost:9048/DynamicsNAV90/OData/
3) Importing Microsoft Dynamics NAV Data into Excel
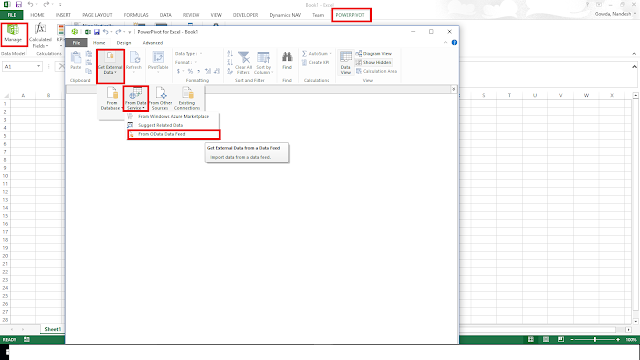
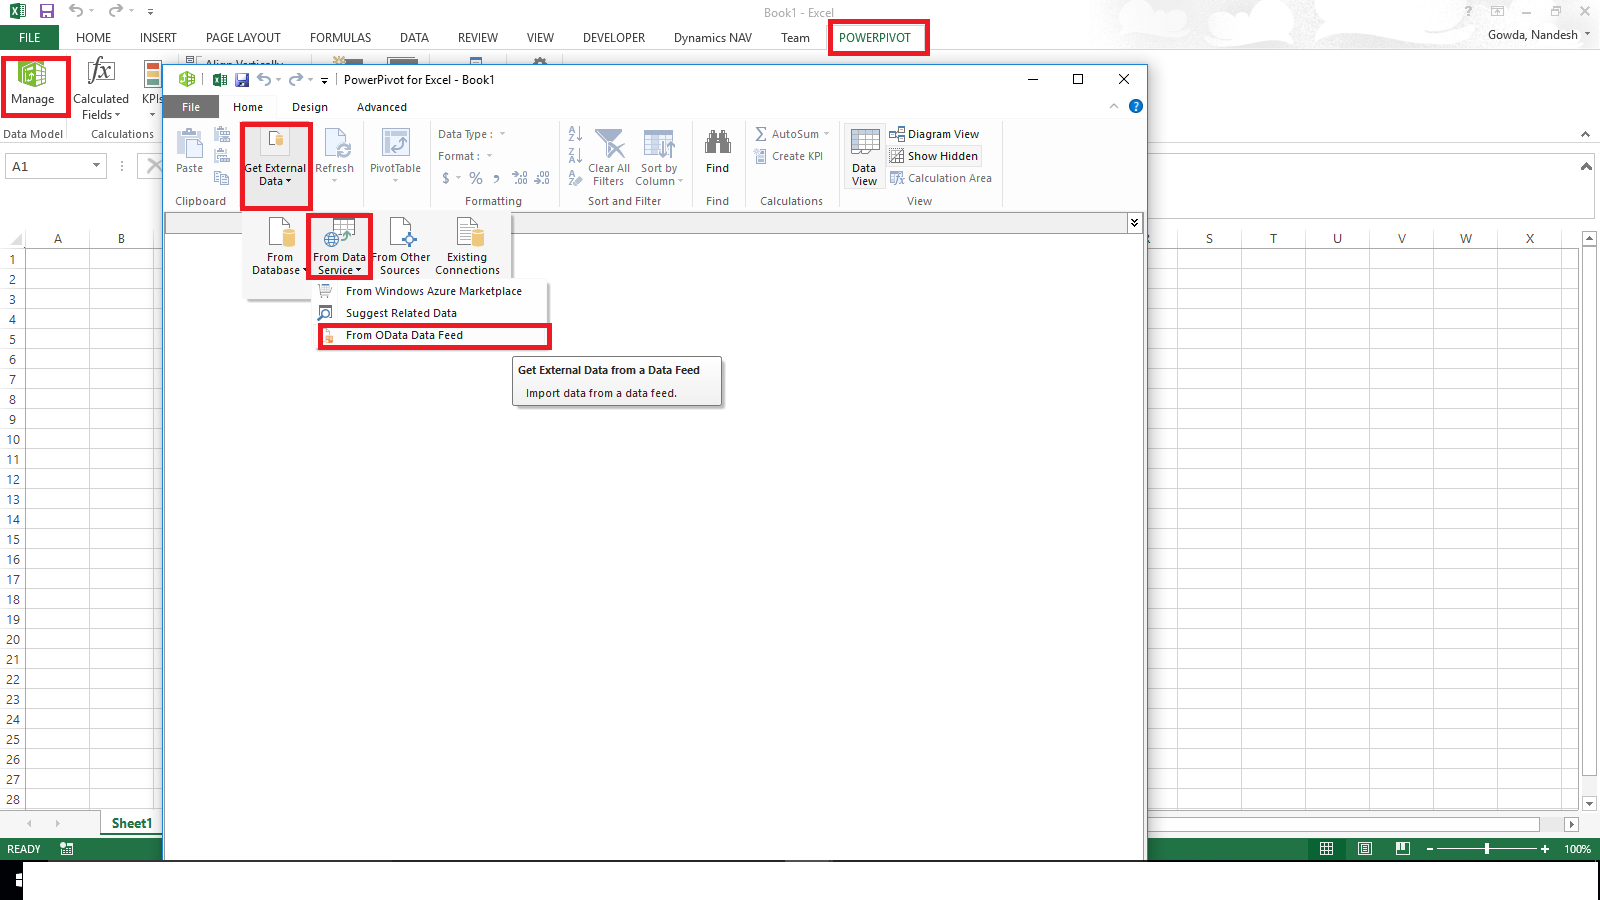
1) In Excel, on the PowerPivot tab, choose Manage. This opens the PowerPivot for Excel window
2) In PowerPivot, on the Home tab, choose Get External Data, choose From Data Service, and then choose From OData Data Feed.
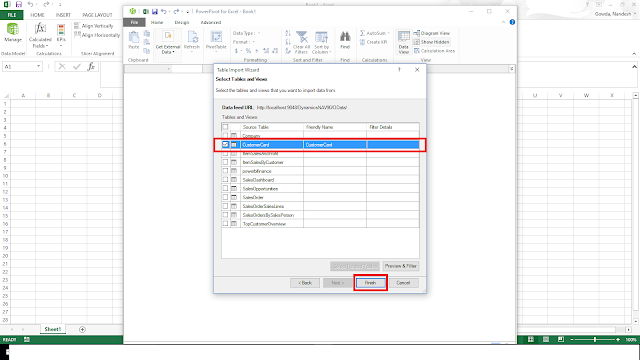
The Table Import Wizard opens
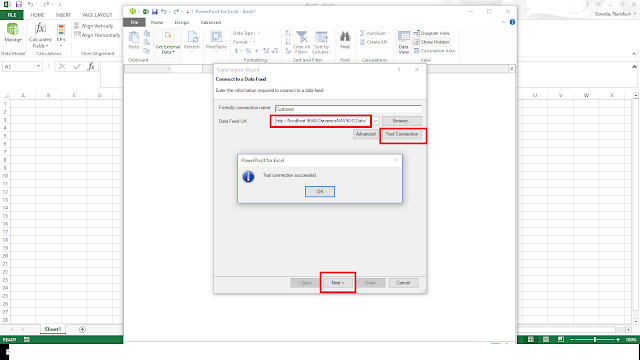
3) In the Connect to a Data Feed page, in the Data Feed Url field, enter the OData URI that you verified in the previous procedure, for example http://localhost:9048/DynamicsNAV90/OData/.
Test the Connection.
Choose the Next button & Select the CustomerCard Web service in Source Table & Finish
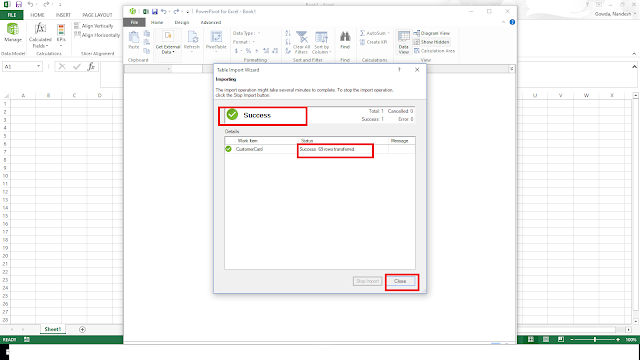
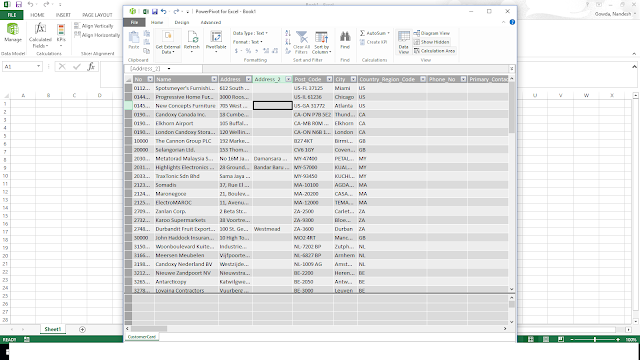
The data from CustomerCard Web Service will appear as shown below.
4) Creating a PivotTable Containing Key Microsoft Dynamics NAV Data
To create a PivotTable
1) In Excel, select the cell where you want the PivotTable located.
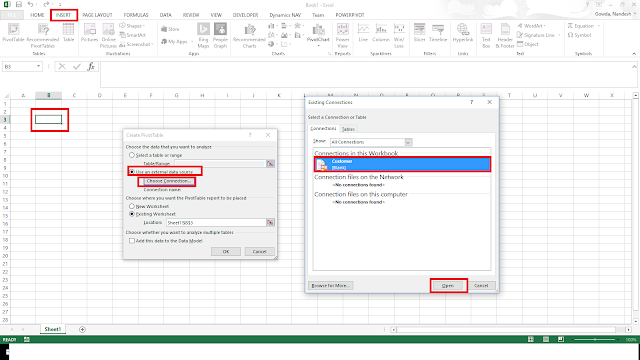
2) In the ribbon, choose the Insert tab, and then in the Tables group, choose PivotTable.
3) In the Create PivotTable dialog box, select Use an external data source, and then choose the Choose Connection button.
4) In the Existing Connections dialog box, on the Connections tab, under Connections in this Workbook, choose the data feed for your OData web service, and then choose the Open button.
5) Choose the OK button to add the PivotTable to the Excel worksheet.
The PowerPivot Field pane on the right side includes a list of fields from the Customer web service that where imported from PowerPivot.
6) In the PowerPivot Field List pane, choose Customer Posting Group.
7) In the Values columns choose Balance LCY
You can play around with the data.

Thanks & Regards,
Nandesh Gowda
Viewing Page Data in Excel Using PowerPivot (OData) : NAV 2016
This walkthrough describes how you can use OData to expose a Microsoft Dynamics NAV 2016 page as a web service and then analyze the page data using Microsoft PowerPivot for Excel 2013
Prerequisite:
Microsoft Excel 2013 with Microsoft PowerPivot enabled, or Microsoft Excel 2010 with the PowerPivot add-in for Excel 2010 installed.
1) Publishing a Page as a Web Service :
1) In the Search box, enter Web Services, and then choose the related link.
2) In the Web Services page, choose New.
3) In the Object Type column, select Page. In the Object ID column, enter 21, and in the Service Name column, enter Customer.
This exposes the Customer Card page as an OData web service.
4) Select the check box in the Published column and close the page

2) Verifying the Web Service’s Availability
In the Internet Explorer field, enter a URI using the following format: http://
Server is the name of the computer that is running Microsoft Dynamics NAV Server.
WebServicePort is the port that OData is running on. The default port is 7048.
ServiceInstance is the name of the Microsoft Dynamics NAV Server instance for your solution. The default name is DynamicsNAV90.
In my case Port No. is 9048 and Please Enable the ODataServices for Service Instance as shown in screenshot.

So below is the URL for me, please run the same in Internet Explorer and you should get your published web service.
http://localhost:9048/DynamicsNAV90/OData/

3) Importing Microsoft Dynamics NAV Data into Excel
1) In Excel, on the PowerPivot tab, choose Manage. This opens the PowerPivot for Excel window
2) In PowerPivot, on the Home tab, choose Get External Data, choose From Data Service, and then choose From OData Data Feed.
The Table Import Wizard opens
3) In the Connect to a Data Feed page, in the Data Feed Url field, enter the OData URI that you verified in the previous procedure, for example http://localhost:9048/DynamicsNAV90/OData/.
Test the Connection.

Choose the Next button & Select the CustomerCard Web service in Source Table & Finish


The data from CustomerCard Web Service will appear as shown below.

4) Creating a PivotTable Containing Key Microsoft Dynamics NAV Data
To create a PivotTable
1) In Excel, select the cell where you want the PivotTable located.
2) In the ribbon, choose the Insert tab, and then in the Tables group, choose PivotTable.
3) In the Create PivotTable dialog box, select Use an external data source, and then choose the Choose Connection button.
4) In the Existing Connections dialog box, on the Connections tab, under Connections in this Workbook, choose the data feed for your OData web service, and then choose the Open button.
5) Choose the OK button to add the PivotTable to the Excel worksheet.
The PowerPivot Field pane on the right side includes a list of fields from the Customer web service that where imported from PowerPivot.
6) In the PowerPivot Field List pane, choose Customer Posting Group.
7) In the Values columns choose Balance LCY
You can play around with the data.


Thanks & Regards,
Nandesh Gowda
Fantastic Post. Thanks
ReplyDelete